Introduction
I have many Raspberry Pi's and use either putty or VNC to access them. Microsoft released Windows Terminal (wt) for Windows 10 1903 (build 18362) or later. Windows Terminal offers a few benefits over the standard putty, the key ones for me are multiple tabs and the ability to open multiple sessions on start-up. Also, I like shiny new tools to play with.
Putty, Plink and SSH
So, having download wt from the Microsoft Store I set about configuring it for Raspberry Pi. The first attempt was to launch putty.exe from wt, unfortunately, this did not work correctly as putty is a full windows application and all that happened was putty launched in its own window. After some searching, I found that included with putty is plink.exe, which is putty's command-line connection tool. This worked and I could connect to one of the Raspberry Pi's, but after some testing, the up-arrow key did not recall the previous commands from the shell history. More searching and unfortunately I did not find a solution, so what next!
The answer became obvious, use the secure shell or ssh command built into Windows 10. This can be found in c:\windows\system32\OpenSSH along with some other SSH commands. If you do not have this go to Apps and Features to add the feature.
Detailed Configuration
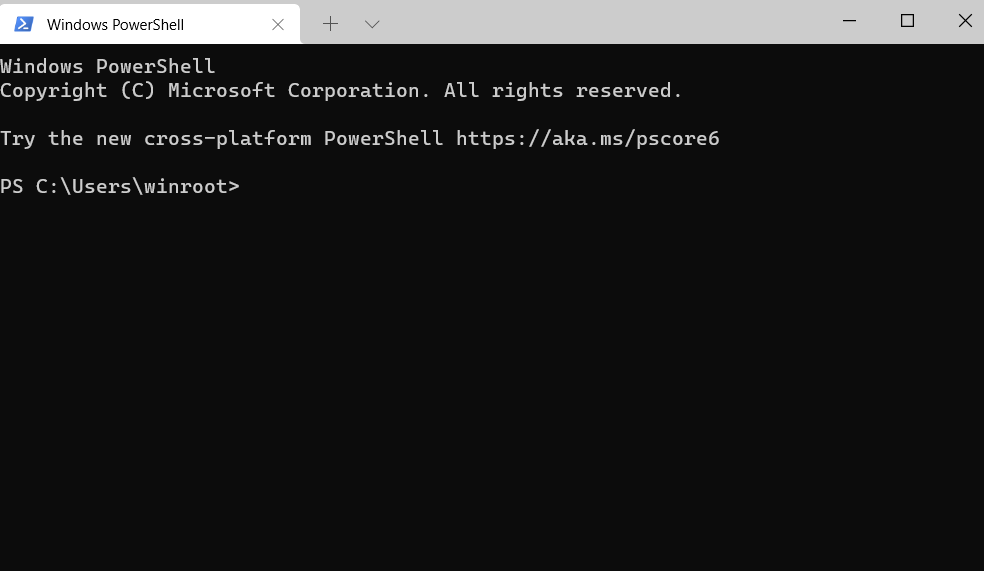
Having installed Windows Terminal from the Microsoft store I started it up and was presented with the following screen:
Adding new Profiles
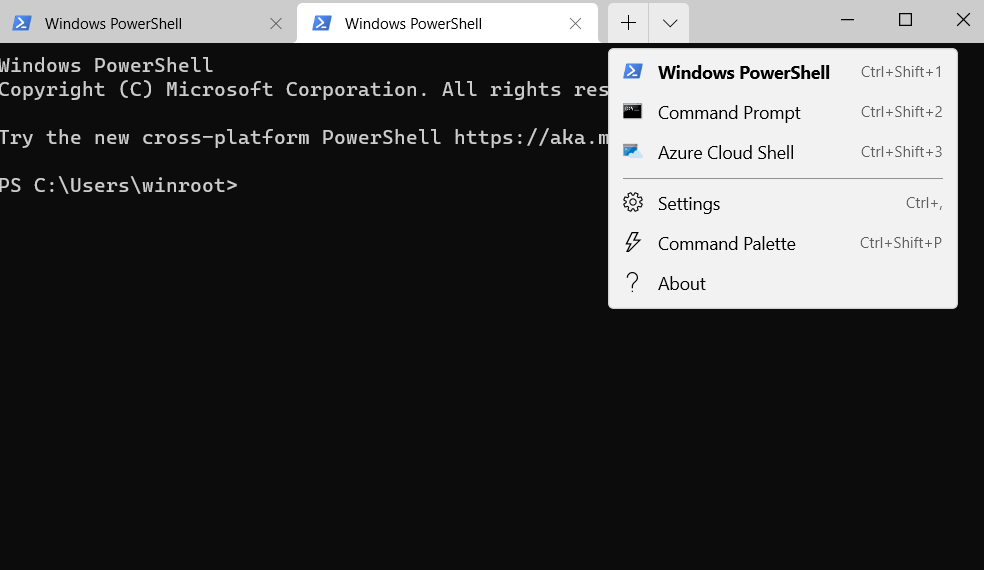
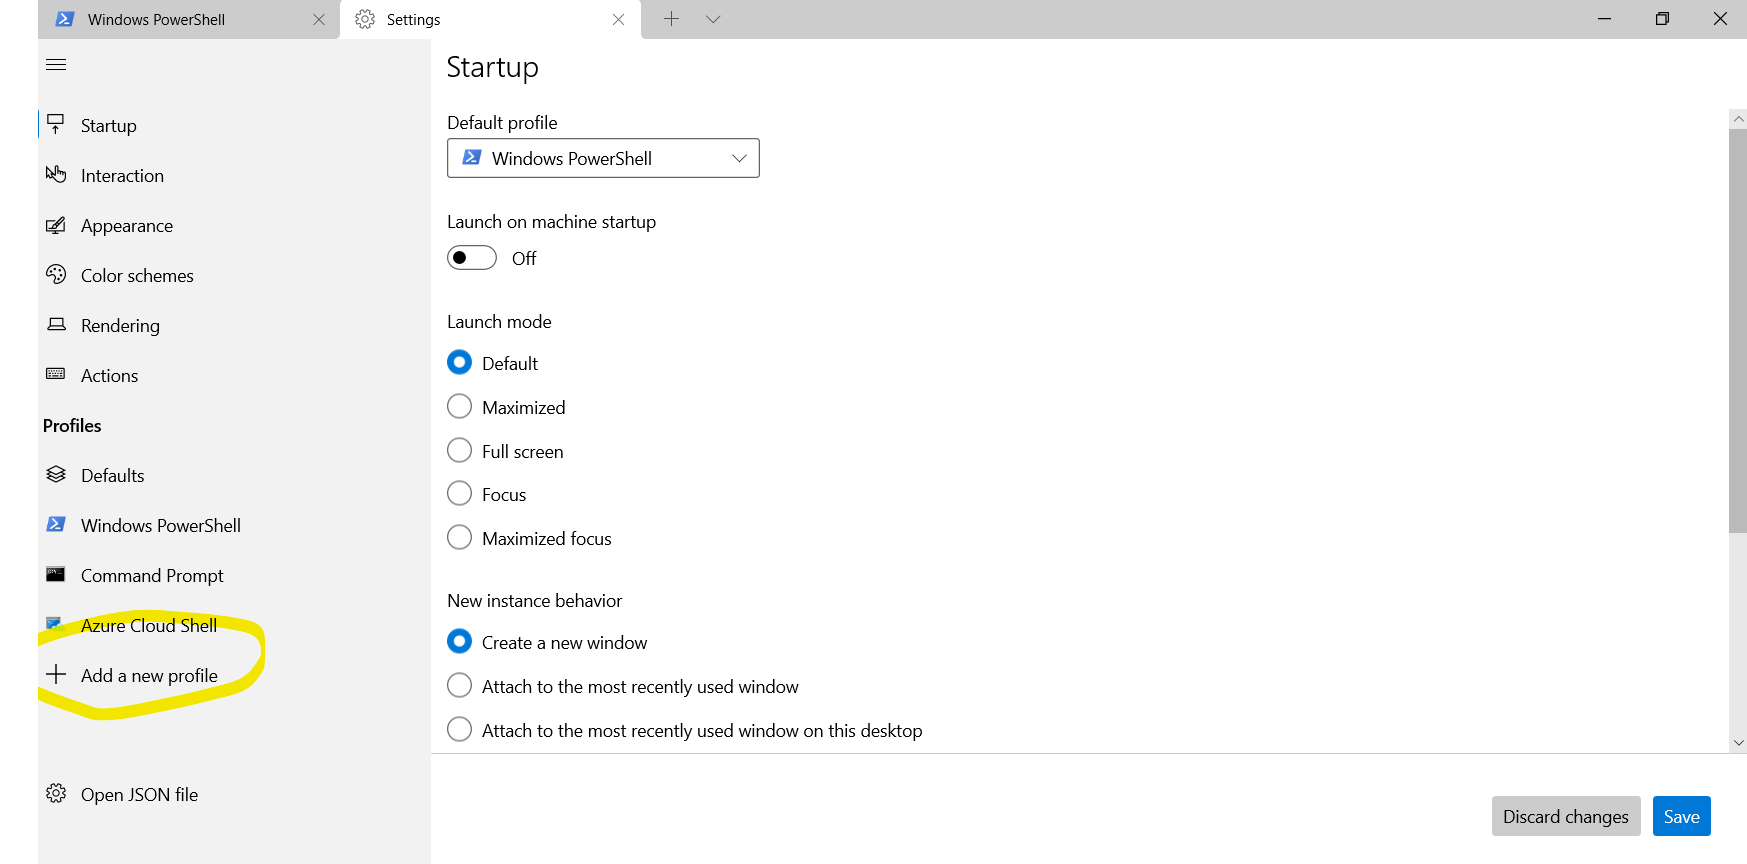
If you click on Command Palette this shows you the keyboard shortcuts and clicking About shows you the version of Windows Terminal. The option we want is the Settings option. Clicking Settings brings up the settings window, then we need to click on the + Add new profile to add a new profile for the Raspberry Pi.
When you click Add a new profile you then have two options + New empty profile or Duplicate. The duplicate option allows you to copy an existing profile to do this select the profile you want to copy and then click the Duplicate button.
Profile Options
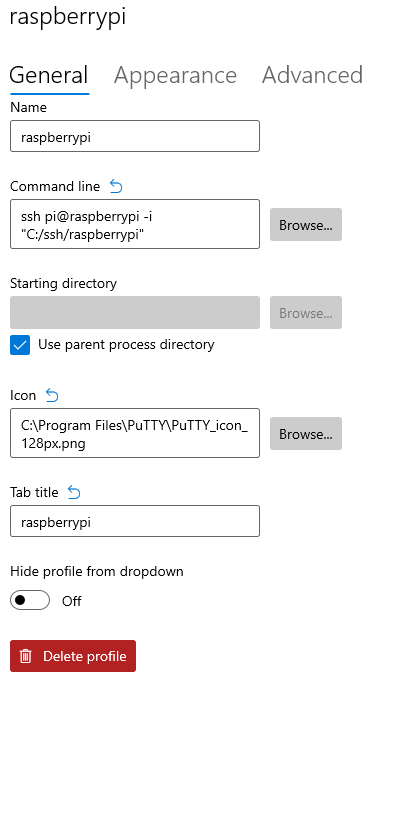
We want to create a new profile so click on + New empty profile. This will bring up the New Profile form. In the General tab you need to complete the following fields:
Name : The name for the profile, in my case the hostname of the RPI, (e.g. raspberrypi)
Command Line : This is the command that will be run, this can be broken down as follows:
ssh : I am using the OpenSSH command located in c:windowssystem32OpenSSH. If this does not work, first check that it is installed and then use the full pathname c:\windows\system32\OpenSSHssh.exe rather than relying on the search path
pi@raspberrypi : To connect I am using the user name (pi) and the raspberrypi's hostname. I have my raspberrypi's hostname in the c:\windows\system32\drives\etc\hosts file, but if you don't you can use the RPI's IP address (e.g. pi@192.168.0.55). You can check if the name resolution is working by running ping <hostname> from a command prompt. In my case, I would type ping raspberrypi in the command prompt. It should return with a ping Reply if you get a Ping request could not find host <hostname> the name resolution is not working so use the IP address instead.
-i c:sshraspberrypi : This is optional, it tells the ssh command to use a key file to authenticate rather than a password. This has to be configured beforehand, take a look at this page on Raspberry Pi Spy by Matt describes the process.
Icon : Optionally you can set the icon for the profile. I found a suitable icon on the internet and downloaded it. Then add the path to the icon in this field.
Tab Title : Give the tab a title. More on this in the next article.
Hide profile from dropdown : Does what it says on the tin!
First time Connecting
That's the basic configuration, save the profile and then launch it. The first time you connect you will get a message like this:
The authenticity of host 'raspberrypi (192.168.0.55)' can't be established.
ECDSA key fingerprint is SHA256:xH3Tzqk9JL0HqZLQHxOsG0898zNc7NhV0217MuyIscE.
Are you sure you want to continue connecting (yes/no/[fingerprint])?
Type yes and you will connect. If you are not using a key file you will need to type your password for the pi account.
You can now duplicate this profile for each of your Raspberry Pi's, changing the Name, hostname or IP address and Tab Title for each one.
And yes the up arrow key will show the previous command from the history !!!
Next we will look at more detailed configuration.

